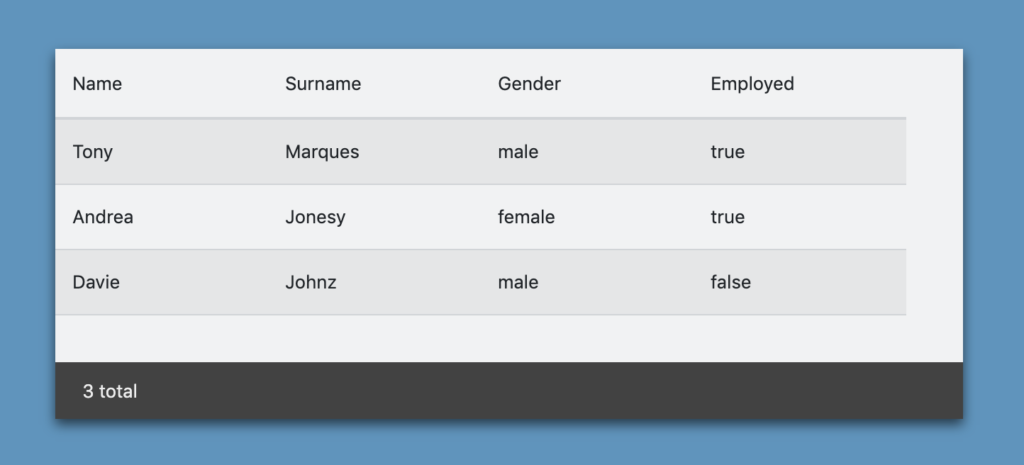
How to setup ngx-datatables

Before I start, yes the image above has a table in it. I was hoping to fit everything into one blog post, but I think it may be best to breaking down into sections, so if its your first time using ngx tables this will hopefully help me and you on how to set it up more or less.

I was trying to find some sources on ngx-datatables and i only found a video podcast about people talking about how great it is from the creator with no real implementing advice. So I want to try to share my learnings from it

This video didn’t really explain how to use ngx-datatables.

I’ve got a repo on this so you can see how it works with working code, I won’t go through the setup of data (although I have added some comments…fun).

git clone https://github.com/tony2tones/ngx-table.git

Firstly setup your project and install the ngx-datatable goodies like so.

npm i @swimlane/ngx-datatable --save

One thing I’ve learned is don’t be so afraid of official documentation their docs which can be found here are actually pretty good so don’t be shy to give it a shot and their demos are great.

Side note for the peeps that want to use bootstrap styling on their ngx-dataatable be sure to check my post on adding bootstrap to a project quick and then add this guy to your projects root styles sheet.

// styles.css
@import "../node_modules/@swimlane/ngx-datatable/release/themes/bootstrap.css";

Ok , so your table comes with its basic stuff, a mock services with a data model to utilising the power of intellisense. If you open the master you’ll see in the app.component.html the following structure for the ngx-datatable.
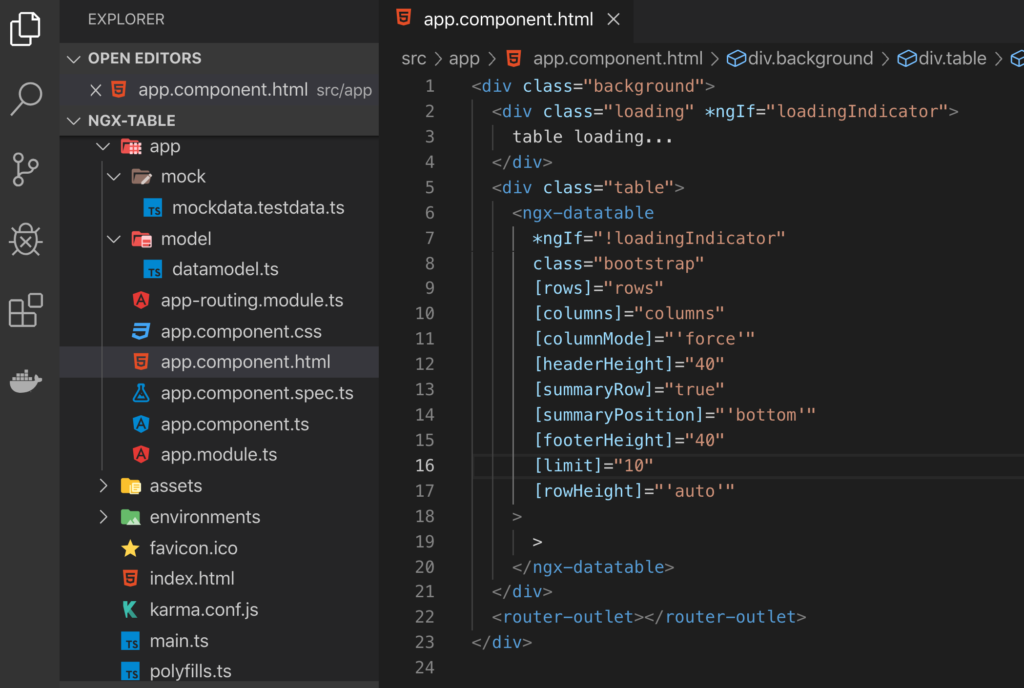
the square bracket stuff.

ngx-datatables are pretty fancy and quite easy to custom. from adding a total count to adjusting column length and pagination. Feel free to edit these properties and find out what they are all about. For example the [columnMode]=”‘force'” just tries to let your column stretch across the dimensions so it doesn’t look weird…cause it looks weird without it.
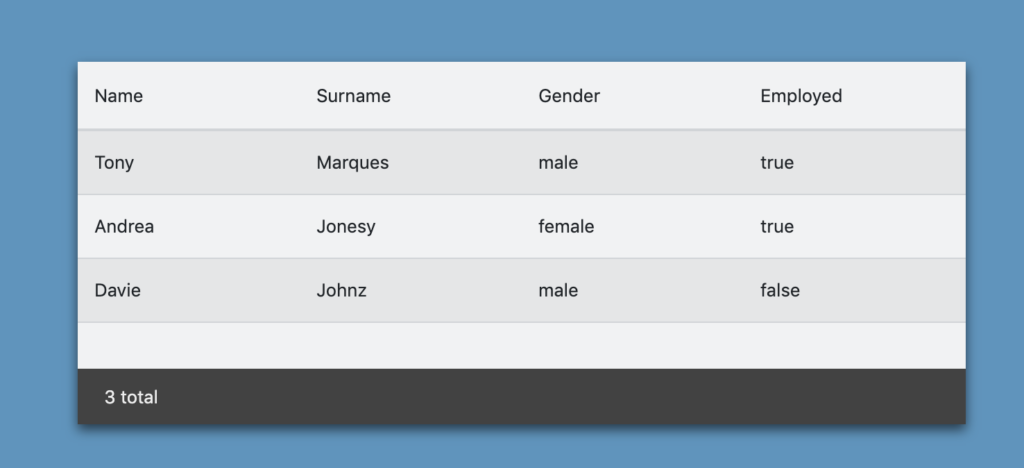
without…gross i know

You will also encounter a columns array with prop and column name objects.

 public columns = [
    { prop: "firstName", name: "Name" },
    { prop: "lastName", name: "Surname" },
    { prop: "gender", name: "Gender" },
    { prop: "working", name: "Employed" }
  ];

The above code basically states the column names and props. I use the props for mapping the naming convention that i receive from the api (which i have mocked in my sample repo) so when the data comes in it knows where to go and with the name it is just the naming of the columns.

I’ve added an empty array called rows and as you can see in my ngOninIt() function i’m setting the data to the said rows array. then WHAM you have yourself a table showing lovely data. Next up will be conditional rendering… very excited to share it….and you can reduce the load time delay if you like. The loader credit goes to here.
Angular: Unit Testing with Services and how to mock ’em

Ok, if you don’t know anything about Services this post is not for you JUST yet. Learn about em and come back here…if you wanna.

For those that made it past my first two lines and continued, we all know that services handle API calls and make real requests. Testing code that requires a service would normally need to receive or send data. You do not want to make real calls, you want to run this unit of code in isolation with no external dependencies. Unit tests normally run with CI (continuous Integration). It is just not feasible to make real API calls (with the chance of failing or taking long time for responses and potential failures). So the question that you want answered is, How to mock API service calls for unit tests?

I have recently come across this problem seeing that I am an official FrontEnd developer (this has happened basically 4 weeks ago still fresh) and one of my duties is to create unit tests for my work. I did some basic assertions which worked fine but there came a problem when it came to requiring a service to unit test my code.

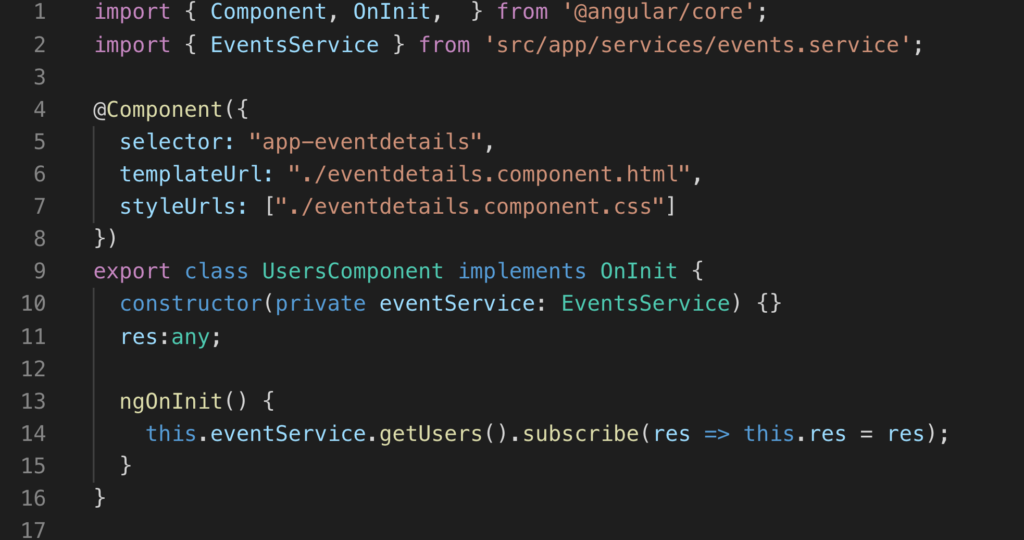
Let’s provide some context. You have a service called EventsService right, this guy has a method/call called getUsers. Simple. Now in the component that you are working with you need to import the EventsService to use that getUsers call for your unit tests as well as import the component you are unit testing.

So you use this guy(above) that makes the getUsers() method that is provided from the eventService upon the component’s ngOnInit() as seen in the image (still above).

With the code above this will make the request and return an observable which you can see we are subscribing to and initialising. So let us get to our spec component.

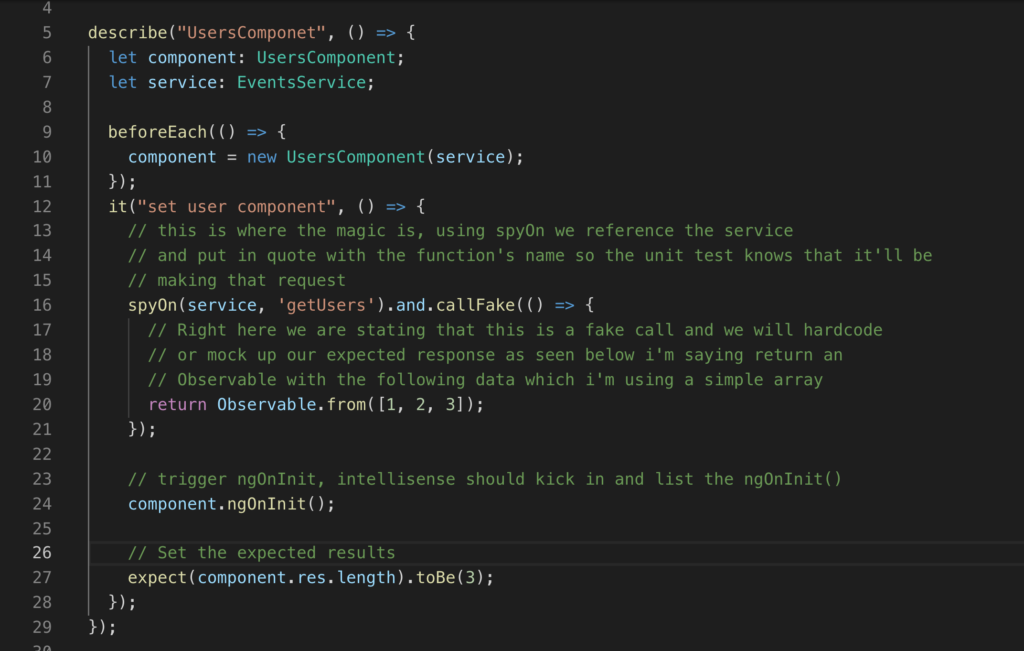
Added some comments for each step, sorry i know that there is a bit going on in this post. I tell ya explaining context is quite a challenge.

So you have declared and imported what services you need, and from there use spyOn to return an observable and set the data you wish to return, after that you would trigger the ngOnInit() from your component. There you have it, you have successfully faked an API call to return data that is to your liking and forming it at your will

Ideally the flow with unit testing is to use the 3 A rule

  • Arrange
  • Act
  • Assert

in the example i’ve been going on about, you can see that the first step was to arrange that service to provide mock data, the act would be to trigger the ngOnInit() from my users component and then Assert to see if the expect results are true.

Of course i am a newbie at this and i’ve i’m completely wrong please feel free to comment and point me in the right direction. Of course there are many way to peel a banana.

the Above examples is using Karma + Jasmine and Angular framework.