How to setup JEST with ANGULAR incl working sample

unit testing

I wanted to make a whole story on this, but i’d rather try make this document as helpful and to the point as possible, hope this helps you setup jest in your Angular project.


import jest setup that is found in the jest-preset-angular.
This will be in your test.ts file

// add to test.ts file
import 'jest-preset-angular/setup-jest';

Add the following jest packages the the package.json

 // package.json file
 
 // update your test script to
    "test": "jest",
 
 // Packages to add to devDependencies
    "jest": "^27.3.1",
    "jest-preset-angular": "^10.0.1"

After adding the jest packages be sure to run npm install, you can also remove the karma packages to keep things tidy.
In the project’s tsconfig.json add the following to your compilerOptions object:

// add the following in your tsconfig.json
...,
  "angularCompilerOptions": {
    "fullTemplateTypeCheck": true,
    "strictInjectionParameters": true
  }

Run the following command, this will help transcript jest to typescript seeing that jest is JavaScript and will need to work with type script.

npm i ts-jest

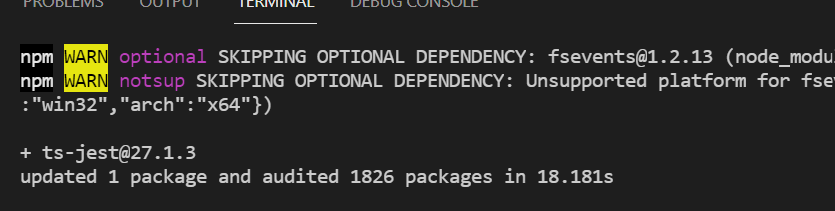
Create a jest.config.js file in the base of your project ‘src/jest.config.js’

const { pathsToModuleNameMapper } = require('ts-jest');
const { compilerOptions } = require('./tsconfig.json');

module.exports = {
    preset: "jest-preset-angular",
    setupFilesAfterEnv: ["<rootDir>/src/test.ts"],
    testMatch: ["**/+(*.)+(spec).+(ts)"],
    moduleNameMapper: pathsToModuleNameMapper(compilerOptions.paths || {}, {prefix: "<rootDir>/"})
}

I think that that should sort you out. With regards to the different versions of Angular and Jest, and its angular preset packages, they seem to be inline with the angular version number, like my project is angular 11 and I have another using 12 and the preset 10 and up seems to cover it. I also have used it on an Angular 9 project and the jest-preset-angular version was 9.0.4

EXTRA SETUP NOTE FOR JEST
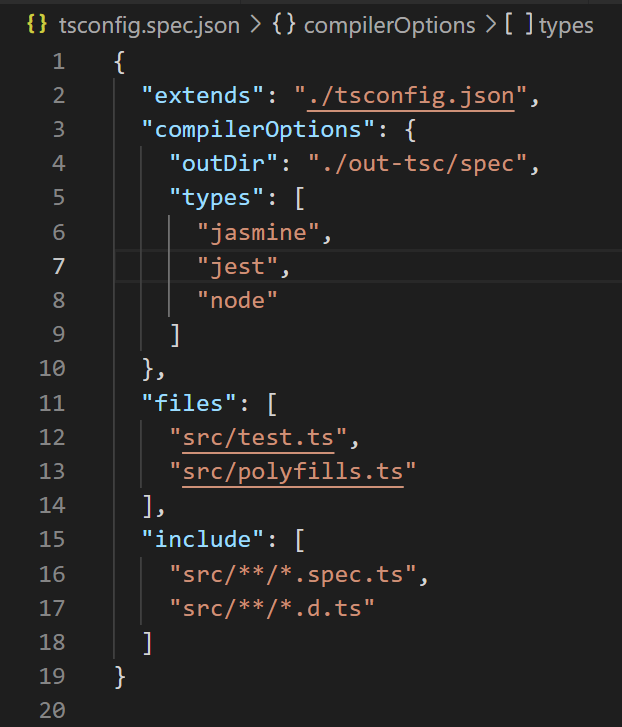
I had to added the Jest to the types in the tsconfig.spec.json, so that my unit test files have access to jest.

Sample project with Jest setup already:
sample-project

Angular: Unit Testing with Services and how to mock ’em

Ok, if you don’t know anything about Services this post is not for you JUST yet. Learn about em and come back here…if you wanna.

For those that made it past my first two lines and continued, we all know that services handle API calls and make real requests. Testing code that requires a service would normally need to receive or send data. You do not want to make real calls, you want to run this unit of code in isolation with no external dependencies. Unit tests normally run with CI (continuous Integration). It is just not feasible to make real API calls (with the chance of failing or taking long time for responses and potential failures). So the question that you want answered is, How to mock API service calls for unit tests?

I have recently come across this problem seeing that I am an official FrontEnd developer (this has happened basically 4 weeks ago still fresh) and one of my duties is to create unit tests for my work. I did some basic assertions which worked fine but there came a problem when it came to requiring a service to unit test my code.

Let’s provide some context. You have a service called EventsService right, this guy has a method/call called getUsers. Simple. Now in the component that you are working with you need to import the EventsService to use that getUsers call for your unit tests as well as import the component you are unit testing.

So you use this guy(above) that makes the getUsers() method that is provided from the eventService upon the component’s ngOnInit() as seen in the image (still above).

With the code above this will make the request and return an observable which you can see we are subscribing to and initialising. So let us get to our spec component.

Added some comments for each step, sorry i know that there is a bit going on in this post. I tell ya explaining context is quite a challenge.

So you have declared and imported what services you need, and from there use spyOn to return an observable and set the data you wish to return, after that you would trigger the ngOnInit() from your component. There you have it, you have successfully faked an API call to return data that is to your liking and forming it at your will

Ideally the flow with unit testing is to use the 3 A rule

  • Arrange
  • Act
  • Assert

in the example i’ve been going on about, you can see that the first step was to arrange that service to provide mock data, the act would be to trigger the ngOnInit() from my users component and then Assert to see if the expect results are true.

Of course i am a newbie at this and i’ve i’m completely wrong please feel free to comment and point me in the right direction. Of course there are many way to peel a banana.

the Above examples is using Karma + Jasmine and Angular framework.

Unit testing with Enzyme and Jest and How to

You had a taste of what its like to set your React project up with unit testing and now you want some more?

Where to start, I think for this particular post I’ll demonstrate how to do some simple assertions and check conditions to be true. If you want to have a more in-depth go, just give a clicky here.

I know that each project is different and unit tests check for a number of things, I was told that there are essentially three steps, define your variables, add your conditions and check whether they are true. Before we tackle the above steps, we’ll need to add some data-tags in our js so that we know how to locate each element for sure (instead of using css/xpath or jquery).

You know what elements to unit test against, be sure to add data tags, should look something like this.

i’ve added some qa data tags

Cool, so we have our data tags all set, now its time to add our *.test.js file, be sure to name it nicely so everyone can know what component this test script is testing.

Now you have a nice new blank [COMPONENT_NAME].test.js file, first step is to be sure to import what you need to make this unit test run for the hills

gotta add your imports (these guys should be available after setting up for unit testing

import React from 'react';
import { shallow } from 'enzyme';

you will also need to import the component that you are unit testing against, so in my case it’ll be the following

import Weather from './Weather';

Now in my weather component i do have a few variables that get populated by an API, so in this case i’ll be mocking them values and giving them a default value due to these values can change depending on the API responses.

const C_TEMP = 'C_TEMP';
const LOCATION = 'LOCATION';
const WEATHERNAME = 'WEATHERNICENAME';

You guys are still with me right? just hold on so now we are going to actually write our first unit test…. in fact i think that this was my first unit test that i’ve ever wrote, hence why its not quite perfect.

the syntax is more or less the same structure when creating a unit test with Jest, you will add a short description on what the unit test is actually testing, kinda like below, i’ll add some comments in below to break it down exactly what it is I’m doing:

1 test('should render a `location to exist`', () => {
2    const wrapper = shallow(<Weather
3        location={LOCATION}
4        cTemp={C_TEMP}
5        WEATHERNAME={WEATHERNAME}
6    />);
7    const expected = true;
8    const actual = wrapper.find('.location').exists();
9    expect(actual).toBe(expected);
10 });

line 1: Adding a description for my unit test, so i’m essentially checking if the element exists.
line 2 to 6: Declaring a const using Enzyme’s shallow function to render the element on its own without worrying about the parent/child structure, so i’m rendering on the weather component with the variables i’m expecting
line 7: I declare a const as my expected conditions, so i want this existence to be true
line 8: Now to state what is actually happening, so i’m saying in the wrapper i expect location className to exists.
line 9: Lastly, here i’m simply stating that actual results to equals to expected
line 10. Closing the unit test

Excellent, in your package.json you should have the ‘test’ script with the following config 

"scripts: {
"test": "jest --config=./jest.config.json --coverage",
},

if you have made a couple of assertions and unit tests, when executing npm test this should run all your unit tests, and you’ll get a pretty graph at the end of it and it should look something like this

So i have added some additional unit tests as you can see by the results table, one of my unit tests actually render my first unit test (does this element exists) redundant, cause if it didn’t exists my other unit tests would not pass…so sometimes things like that happen when you have to keep things dry (don’t repeat yourself). Let me know if you were able to get your first unit test running.

This blog post took me a bit of time to write, so if you are facing any problems please let me know and i’ll see if I can assist. I’m not saying that i’m the best and i know everything , but this is what worked for me.

thanks again for reading, catch you next time.

Unit testing with Enzyme and Jest and Setting up

{/* Before I begin this post is just a how to setup up your project to run unit tests, i’ll probably go over some examples of actual unit tests in a later post. */}

Hello again

So you’re wondering how to make some sweet Unit tests, well so was I. Spoke to my FrontEndFriends, got some high level guidance and I gave it ago to implement it myself.

Here is how to setup up your project with Jest and enzyme.

First thing you’ll need to do is install jest, enzyme and enzyme-adapter-react-16 as a `devDependency`.

So go on install that sucker using npm install jest, enzyme and enzyme-adapter-react-16

npm install jest enzyme enzyme-adapter-react-16 --save-dev

Once all the little packages are installed, you will need to setup the following below.
– add a test-setup.js file
– Add the test-setup.js file to jest.config.json

What does this test-setup.js file need and where does it go? You can use my project as a reference. I made a folder called .jest and added two files:
– shim.js
– test-setup.js

You might be asking “what the heck is a shim folder and what is it doing here?” If you don’t have this file your application starts to complain, so to stop the whinging you’ll need a shim.js in your .jest folder.

Luckily shim.js just consists of the following code:

global.requestAnimationFrame = (callback) => {
setTimeout(callback, 0);
};

Finally, we get to add our test-setup.js here is how mine looks:

// eslint-disable-next-line import/no-extraneous-dependencies
import { configure } from 'enzyme';
// eslint-disable-next-line import/no-extraneous-dependencies
import Adapter from 'enzyme-adapter-react-16';
configure({ adapter: new Adapter() });

The comments are optional of course.

Now for the next step, that is take test-setup.js file add it to jest.config.json. So navigate to your root directory (where you see all your friends such as package.json and what not and create a file called jest.config.json and add the following code:

{
"verbose": true,
"testURL": "http://localhost/",
"moduleNameMapper": {
"\\.(css|jpg|png)$": "/empty-module.js"
},
"setupFiles": [
"/.jest/shim.js",
"/.jest/test-setup.js"
]

Once all is said and done, add this little guy to your package.json to make running unit tests just a little bit easier

Add a script for `jest`: `jest –config=./jest.config.json –coverage`

Now you should be fully setup if you are running into any problems these references should add some extra guidance happy unit testing!

If you want to do some more reading on unit tests feel free to check out these references:
Jest
Enzyme