I was hunting around the net for a solution to this little bugger. The solution i found is quite a simple one. If there is a better way, be sure to let me know in the comments. Here is a step by step on how to fix this issue.
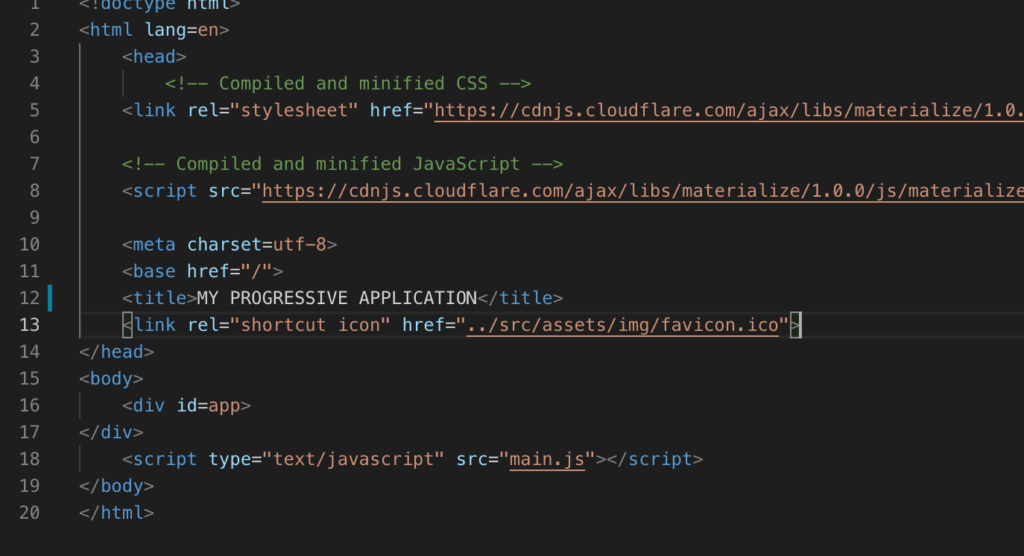
Note the file structure and the index.html within the src folder
You want to open up your index.html within your src folder and in your <Header /> tag and add the following:
It should look a little something like this your index.html
using the link tag, this should render your favicon
I believe that it is best practice to use an ICO formatted icon for cross browser functionality. If using a png, you can use just about any online ico converter.
You had a taste of what its like to set your React project up with unit testing and now you want some more?
Where to start, I think for this particular post I’ll demonstrate how to do some simple assertions and check conditions to be true. If you want to have a more in-depth go, just give a clicky here.
I know that each project is different and unit tests check for a number of things, I was told that there are essentially three steps, define your variables, add your conditions and check whether they are true. Before we tackle the above steps, we’ll need to add some data-tags in our js so that we know how to locate each element for sure (instead of using css/xpath or jquery).
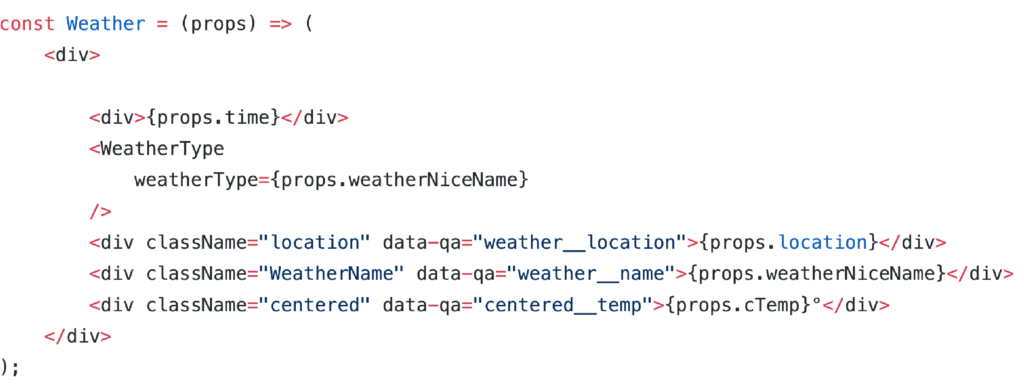
You know what elements to unit test against, be sure to add data tags, should look something like this.
i’ve added some qa data tags
Cool, so we have our data tags all set, now its time to add our *.test.js file, be sure to name it nicely so everyone can know what component this test script is testing.
Now you have a nice new blank [COMPONENT_NAME].test.js file, first step is to be sure to import what you need to make this unit test run for the hills
import React from 'react';
import { shallow } from 'enzyme';
you will also need to import the component that you are unit testing against, so in my case it’ll be the following
import Weather from './Weather';
Now in my weather component i do have a few variables that get populated by an API, so in this case i’ll be mocking them values and giving them a default value due to these values can change depending on the API responses. const C_TEMP = 'C_TEMP'; const LOCATION = 'LOCATION'; const WEATHERNAME = 'WEATHERNICENAME';
You guys are still with me right? just hold on so now we are going to actually write our first unit test…. in fact i think that this was my first unit test that i’ve ever wrote, hence why its not quite perfect.
the syntax is more or less the same structure when creating a unit test with Jest, you will add a short description on what the unit test is actually testing, kinda like below, i’ll add some comments in below to break it down exactly what it is I’m doing:
line 1: Adding a description for my unit test, so i’m essentially checking if the element exists. line 2 to 6: Declaring a const using Enzyme’s shallow function to render the element on its own without worrying about the parent/child structure, so i’m rendering on the weather component with the variables i’m expecting line 7: I declare a const as my expected conditions, so i want this existence to be true line 8: Now to state what is actually happening, so i’m saying in the wrapper i expect location className to exists. line 9: Lastly, here i’m simply stating that actual results to equals to expected line 10. Closing the unit test
Excellent, in your package.json you should have the ‘test’ script with the following config
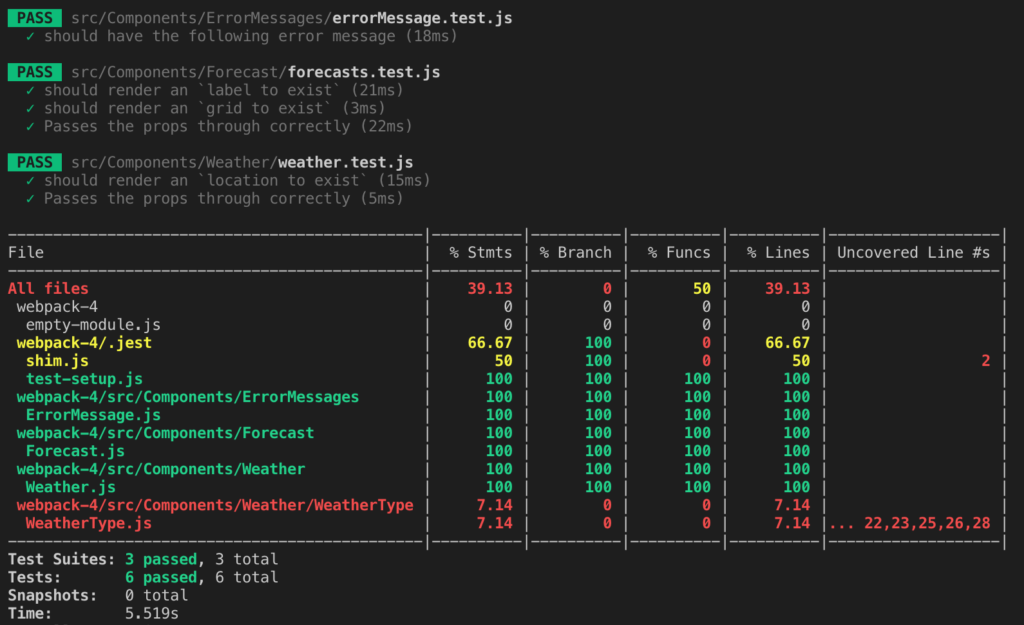
if you have made a couple of assertions and unit tests, when executing npm test this should run all your unit tests, and you’ll get a pretty graph at the end of it and it should look something like this
So i have added some additional unit tests as you can see by the results table, one of my unit tests actually render my first unit test (does this element exists) redundant, cause if it didn’t exists my other unit tests would not pass…so sometimes things like that happen when you have to keep things dry (don’t repeat yourself). Let me know if you were able to get your first unit test running.
This blog post took me a bit of time to write, so if you are facing any problems please let me know and i’ll see if I can assist. I’m not saying that i’m the best and i know everything , but this is what worked for me.
Howdy, i’ll keep this sweet, brief and to the point 🙂
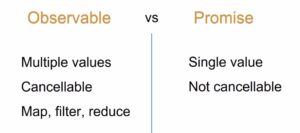
Observerable and Promises are in a nutshell ways to handle API responses. Your next question may be on what exactly is the difference, well thanks to this lurrvly tutorial I was able to find out.
In the tutorial JsWiz (not too sure if this is the person’s real name but what do i know) he has a clear image and shows that observables are great for multiple values and they are cancellable. When you subscribe to an Observable it will keep on listening for any changes and updates. Which in some cases are handy, but if you are looking for a simple request and getting a single response then a Promise is what you need i promise you.
the difference between observable and promise
Ok, thats about all i have to say about Observerable and Promises, but if you want to know how to implement it just checkout this linkers