

Using reusable components and passing data to them. There are a number of ways to pass data to and from parent to child, but I will be focusing on the @Input and @Output decorators. I’m hoping to go through both these guys and have a working angular project with working examples with TypeScript models.
Setting up
I would start by just making a new component via the cmd.
// Generates a new component into the "components" folder.
ng g c components/cardprofile
// or
ng generate component components/cardprofile
From there you will need to build your ideal card UI and take note on what data you would like to populate into said component.
// Just add the card component selector to the app.component like so
<app-card-profile></app-card-profile>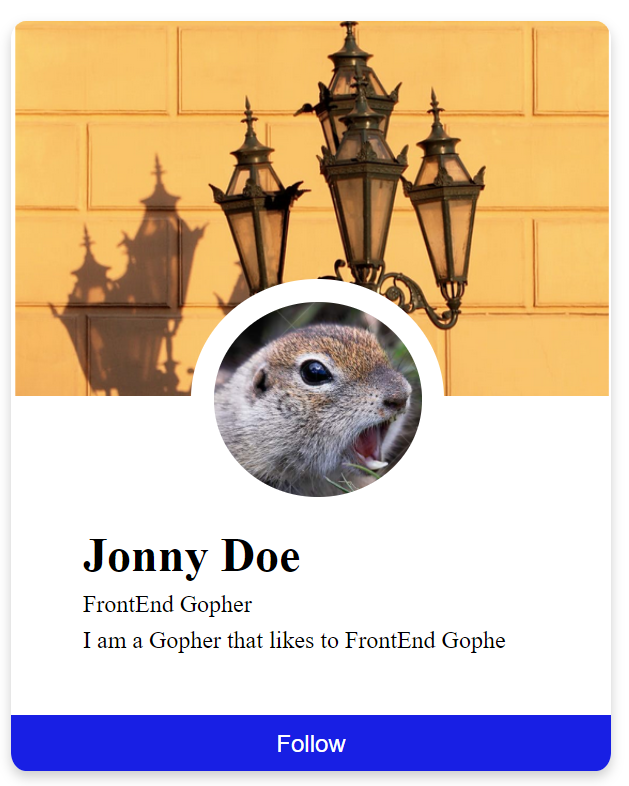
Not the prettiest I’m no designer, but this is a card profile component none the less. I think its fine to start with some hard coded data. Just note the details we want to add dynamically, like Name, Job and bio.
In the card profile component i made the following object just for a single entry.
// set within the card profile component for hardcoded data
      name = 'Jonny Doe';
      job = 'FrontEnd Gopher';
      bio = 'I am a Gopher that likes to FrontEnd Gophe';
In the card.profile.component.html view I updated the fields with string interpolation for name, job, bio fields.
// card profile component html
<div class="container">
  <div class="card">
    <div class="banner-image">
      <img class="cover" src="../../../assets/images/profilebgimage.PNG" />
    </div>
    <img class="profile" src="../../../assets/images/gopher.PNG" alt="Avatar" />
    <div class="footer">
      <h1 class="name">{{ name }}</h1>
      <p class="description">{{ job }}</p>
      <p class="description">{{ bio }}</p>
    </div>
    <button class="btn">Follow</button>
  </div>
</div>
Now we have a working card that can accept values and render them in the view!
A good practice would be to create a modal for that data structure, so I made a Card interface.
export interface CardProfile {
    name: String,
    job: String,
    bio: String,
}
Implementation of @input()
Now we import our @Input() from ‘@angular/core’ for the Card component and make an @input for each piece of data we want to populate in the card component.
import { Component, Input } from '@angular/core';


@Component({
  selector: 'app-card-profile',
  templateUrl: './card.profile.component.html',
  styleUrls: ['./card.profile.component.css'],
})
export class CardProfileComponent {
  @Input() name: String;
  @Input() job: String;
  @Input() bio: String;
}
Now that we have our inputs set for the card component we’ll need to pass through the data from the app.component (Parent component) into the card component’s selector, so we’ll need to add the inputs in the card component selector as seen below <app-card-profile> is the child component and we are using it in the app.component.html.
// Add this to your app.component.html
<app-card-profile [name]="userProfile.name"
          [job]="userProfile.job"
          [bio]="userProfile.bio">
</app-card-profile>
Now for the data to come from the app.component.ts into the card component via the app.component.html view.
import { Component, OnInit } from '@angular/core';
import { CardProfile } from './models/cardProfile.model';

@Component({
  selector: 'app-root',
  templateUrl: './app.component.html',
  styleUrls: ['./app.component.css'],
})
export class AppComponent implements OnInit {
  title = 'input-output';

// userProfile with type cardProfile
  userProfile: CardProfile;

// object that we are going to pass into the card component
  data = {
    name: 'Jonny Doe',
    job: 'FrontEnd Gopher',
    bio: 'I am a Gopher that likes to FrontEnd Gophe',
  };

  ngOnInit() {
// setting the userProfile with the data...data
    this.userProfile = this.data;
  }
}
Now to add multiple card profiles! Lets setup the data first and make our userProfile to be userProfiles array…. which i’ll save for the next post.
If you faced any problems have a look at source code on this repo