Angular Toast Notifications, quick! (for newbies)

Alright alright, it has been a long time. Now it’s time to take you through how to add a toast notification and fast.

The quickest and easiest way I could find was using this lil npm package from ngx-toastr is what you need for a quick and simple implementation.

Following the guide and going through the steps its pretty straight forward, but if you are having any troubles like i have…on that one time, i’m happy to share my findings.

Step one:

npm install ngx-toastr --save
// and if you already have it installed
npm install @angular/animations --save

Cool so let that little console run. Once installed be sure to add the imports to your app module like so
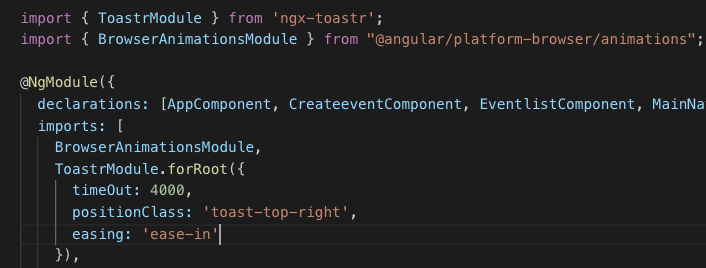
Add them imports to your app.module.ts

As you can see I have added something a little extra to the ToastrModule.forRoot({}), in those brackets you can do a number of tricks, adjust positioning animation and the works here are some details
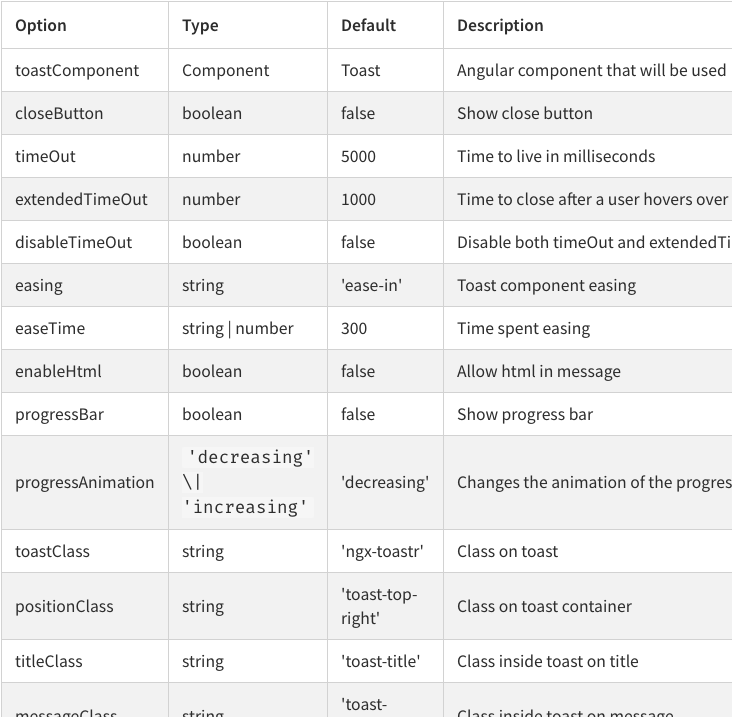
and there are a number of options more

Now you need to add the stylings so the app knows how to make your toastie look good, check out your styles.css the main one ya’ll know what i’m talking about. You have a number of styling imports. This is where you need to be a tiny bit careful and note what style libraries you are using is it Bootstrap? Angular material? is it something else? Luckily we can do an import for whatever your style framework that you have implemented.

// regular style toast 
@import '~ngx-toastr/toastr';
 
// bootstrap style toast 
// or import a bootstrap 4 alert styled design (SASS ONLY) 
// should be after your bootstrap imports, it uses bs4 variables, mixins, functions 
@import '~ngx-toastr/toastr-bs4-alert';
 
// if you'd like to use it without importing all of bootstrap it requires 
@import '~bootstrap/scss/functions';
@import '~bootstrap/scss/variables';
@import '~bootstrap/scss/mixins';
@import '~ngx-toastr/toastr-bs4-alert';

So the problem i was facing was that i have implemented the toast notifications and all but they were not displaying. Turns out i was not using the correct toastr import styles. So lil lesson for me be sure to take note on what styling framework/libraries you are using. I used the regular toast implementation.

For my implementation of the toast notifications i wanted to add it as a service/shared component so it can be reused throughout the app..well “web-app” I am making, it looks a lil something like this (toast-message.service.ts).

import { Injectable } from '@angular/core';
import { ToastrService } from "ngx-toastr";

@Injectable({
  providedIn: 'root'
})
export class ToastMessageService {
  constructor(private toastr: ToastrService) { }
    showSuccess(text: string, title: string) {
        this.toastr.success(text, title);
    }
    showFail(text: string, title: string) {
      this.toastr.error(text, title);
  }
}

this way i’m able to inject this service into the constructor and utilise my toastie notifications for both success and error scenarios also having the freedom of adding my own text for the success/failure situation.


import { ToastMessageService } from "../../services/toast-message.service";
export class SomeCoolComponent implements OnInit {
  constructor(private toastr: ToastMessageService) {}

ngOnInit() {
this.toastr.showSuccess(
           // Body content of toastie
           "Has been successfully created.",
           // Header of toastie
            "A Toast notification"
          );
this.toastr.showError(
           // Body content of toastie
           "Has been successfully created an error.",
           // Header of toastie
            "A Toast notification for the masses and friends"
          );
}
}

I think that that about does it. This should be quick and simple, my project is running Angular 7. Lemme know if you come across any issues.
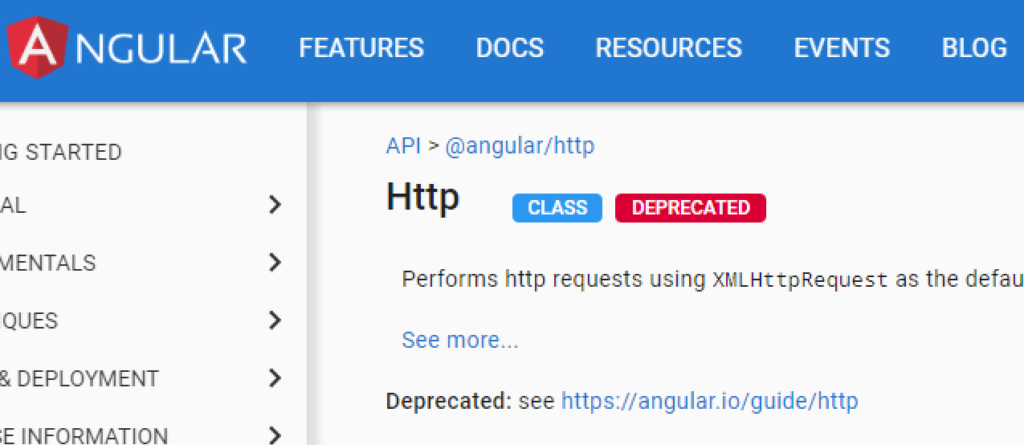
Angular Http deprecated??!!

I know that this post is a little click batey, but I was in a total shock when I heard the news and you won’t believe what happened next.

Angular developers are outraged, I think

You may be asking when did this happen ( 20 Aug 2017 apparently) and what am i supposed to do now, I’ve got this tutorial that I’m following but this geyser is using Http!

Don’t stress, Angular is now using an improved method to handle HTTP requests using HttpClient. I’m going to go over some basics.

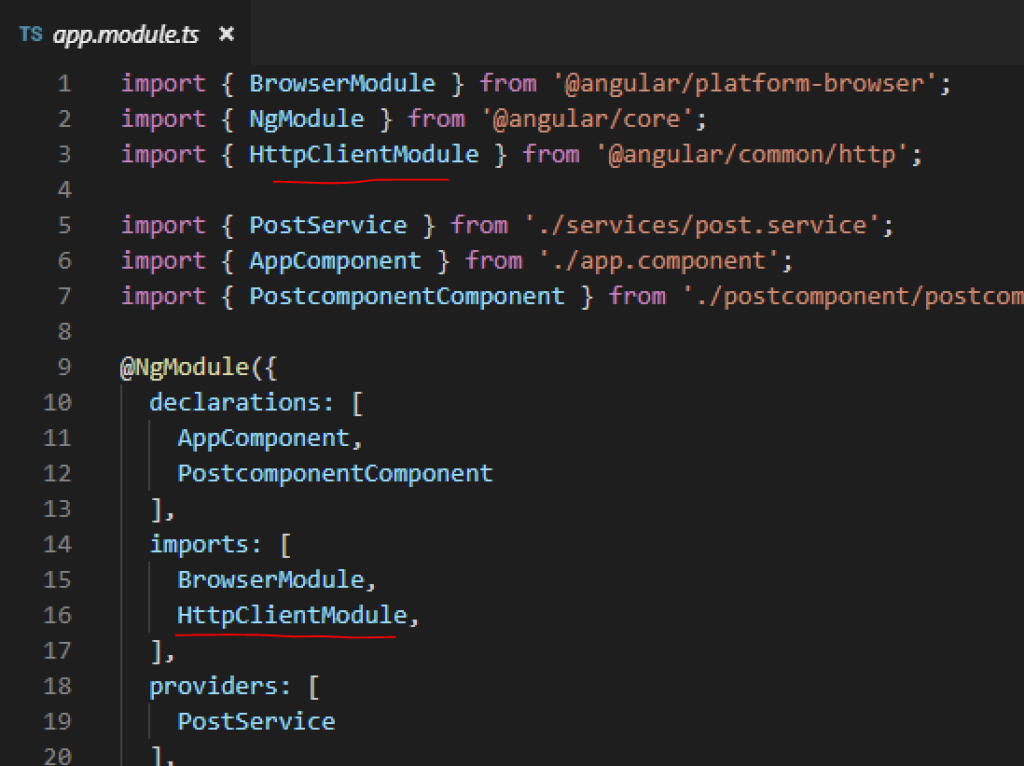
Firstly you will need to add HttpClient to your app.model.ts file in the imports section. You may be asking do I have to, my reply is if you want this to work yes.

Cool, so with that done we have access to all the HttpClientModule’s tricks.
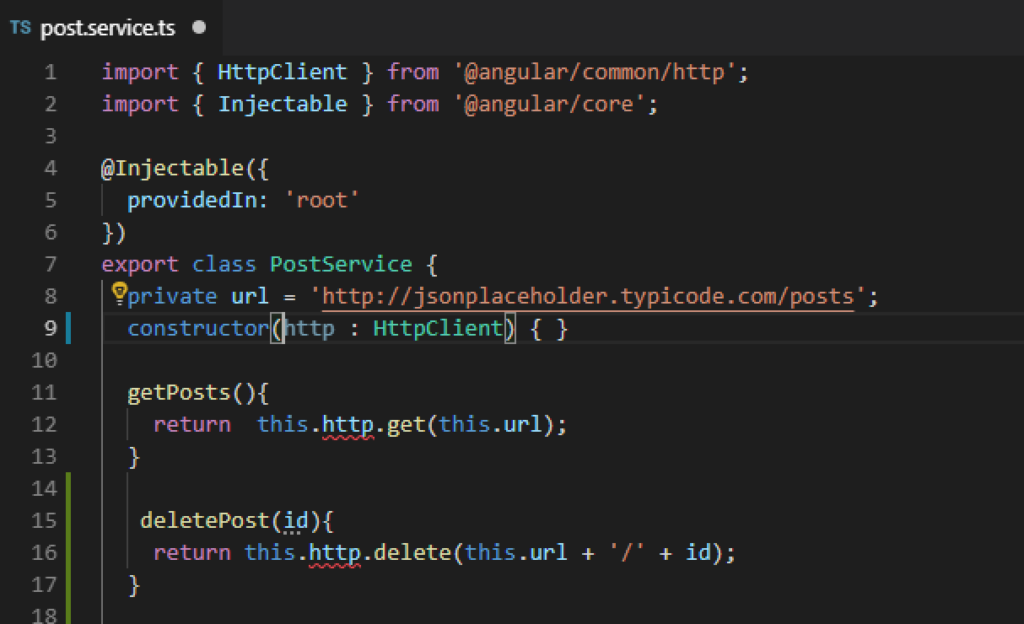
I have created a service component to show off my http skills, be sure to import the httpClient as …HttpClient on top of your typeScript file like so.

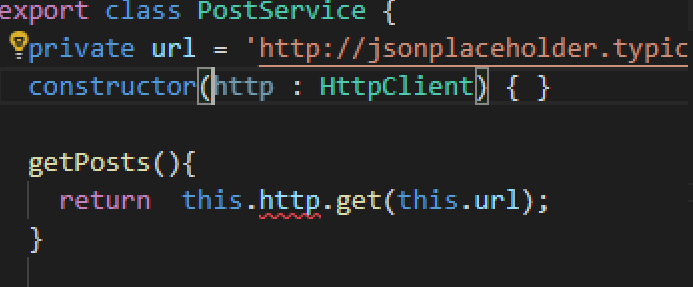
So you’ve happily imported your HttpClient, and created your constructor with (http: HttpClient). Now you’re seeing a compile error and thinking…

what is dees?!

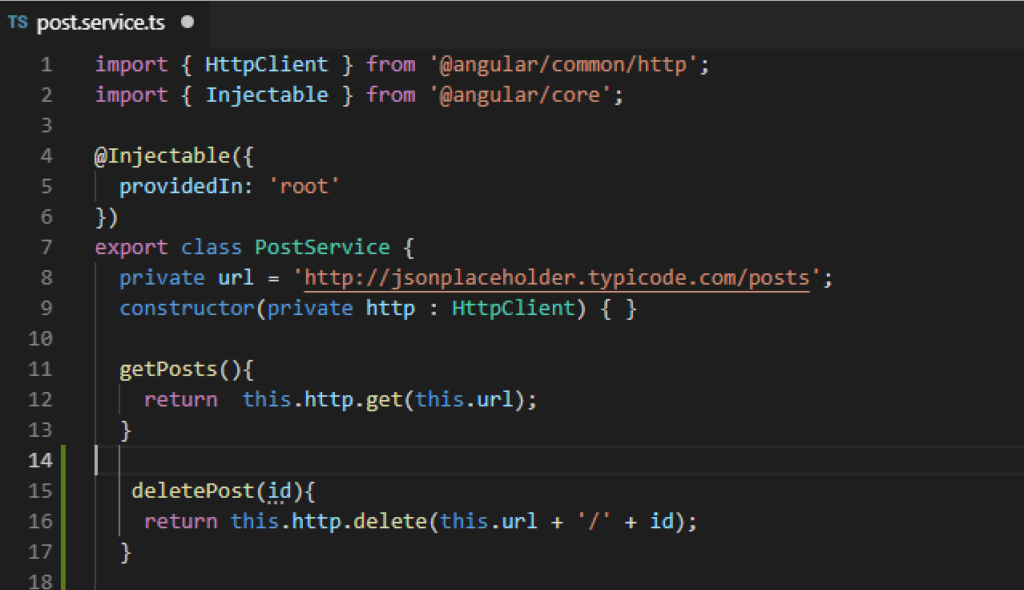
If you add a “private” in the constructor you will see that the http will be available throughout that specific ts file and the compile error will magically disappear , so do not stress.

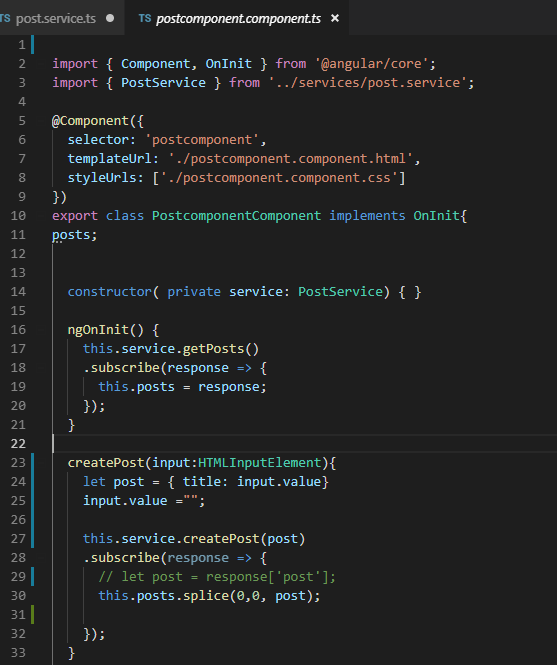
You may not have tried using a service components, this is just to clean up your code and put it into good reading order. Best practice for api calls to be located into these service component files. As you can see in the screenshot below that i reference the service call to get access to the api calls for my application.

i.e. be sure to not share end points to the public, but this end point is for practice and funzies so knock yourself out with jsonplaceholder.typicode.com

For more information about httpClient be sure to checkout Angular docs.

Angular: Observerable vs Promise

Howdy, i’ll keep this sweet, brief and to the point 🙂

Observerable and Promises are in a nutshell ways to handle API responses. Your next question may be on what exactly is the difference, well thanks to this lurrvly tutorial I was able to find out.

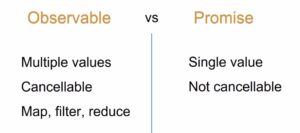
In the tutorial JsWiz (not too sure if this is the person’s real name but what do i know) he has a clear image and shows that observables are great for multiple values and they are cancellable. When you subscribe to an Observable it will keep on listening for any changes and updates. Which in some cases are handy, but if you are looking for a simple request and getting a single response then a Promise is what you need i promise you.

the difference between observable and promise

Ok, thats about all i have to say about Observerable and Promises, but if you want to know how to implement it just checkout this linkers

for more info checkout these links:
mdn Promise docs
mdn Observable docs

How to setup a React project from Scratch with Webpack 4

(tutorial link is a little down below if you don’t want to hear my testimony 😛 )
When I started my adventure of Learning React, going through Facebook’s React tutorials and starting a simple app with the famous, simple, easy to use create-react-app. I thought well this is easy.

When looking up to my colleagues for some advice in getting myself into the React scene and becoming a React Developer. they told me if you want to be taken seriously you have got to know how to create a React project from Scratch.

I heard the framework Webpack being mentioned(yes there are many others don’t worry, but this is what I’ve been exposed to). I went to a colleague for some guidance on how to setup a project from scratch using webpack, i think it was webpack 3.somethingorother.3^ and I was completely lost confused and out of my depth…distraught, flabbergasted, bamboozled, hoodwinked the works.

Problem was I knew I had to learn how to do this. I was searching the net to find a nice tutorial to help me setup a project using webpack and Luckily I came across this tutorial which helped me setup a project from Scratch using webpack

Here is the tutorial:
https://www.valentinog.com/blog/webpack-tutorial/

I do hope that this helps you as much as it helped me…by actually taking me through the steps and getting a working project from Scratch using webpack 4.

Enjoy

I’ll probably be posting a few tutorials on this blog to help others where I’ve been struggling.