Understanding EventEmitters [for newbies]

I was trying to figure out how to use eventEmitters, be cause I forgot and I had no clue how to use them anymore. Then I came across this amazing video that shows you how its done.

this guy knows his stuff.

If you don’t want to watch the video or don’t have access to speakers, saving data… whatever, you can just follow along with me and my ways of explaining things to help me understand myself.

So I just want to explain it the best way i can understand it…so this won’t be textbook but it’ll probably just makes sense to me..ok enough disclaimers lets go.

Firstly you want to have an eventEmitter sample you can just go and clone this fella.

git clone https://github.com/tony2tones/eventEmitter-sample.git

There, now you have a project that has some eventEmitter action going down. It’s simple and it is a console log, but it’s the foundation to where we can start to understand whats happening.

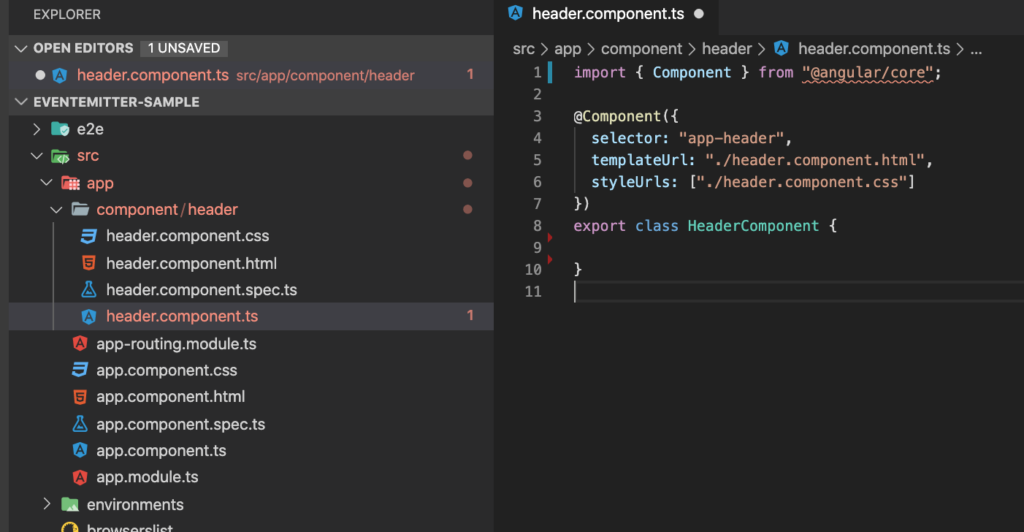
Off the bat we can see that we will have a parent and child components to work with.

<app-component></app-component>
<header-component></header-component>

Let’s Navigate to the header component.

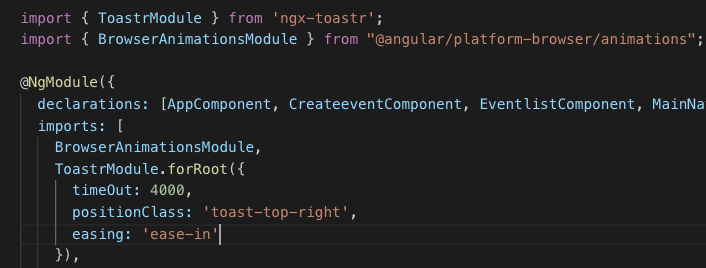
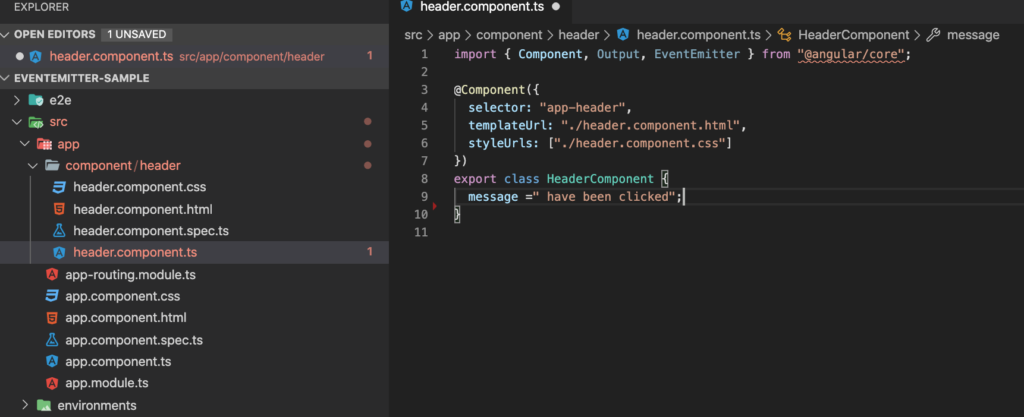
Now import Output, EventEmitter and a message to emit.

Maybe i’m going a bit slow, but it’ll pick up quickly i promise.

Now we can use those imports with making a new EventEmitter variable. This is very exciting and for the sake of speed you also added a function that emits the message…Oh also forgot an array of menu options.

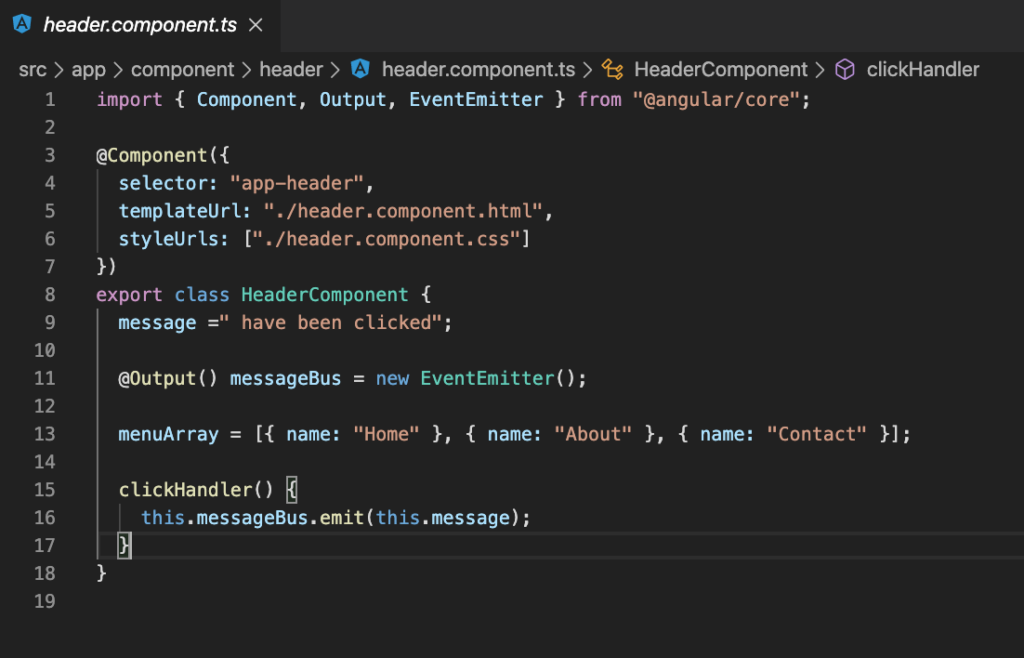
Sweet, so we have made an emitterable variable called ‘messageBus’ which will “carry” the message string and emit it world wide.(within the boundaries of your angular project)

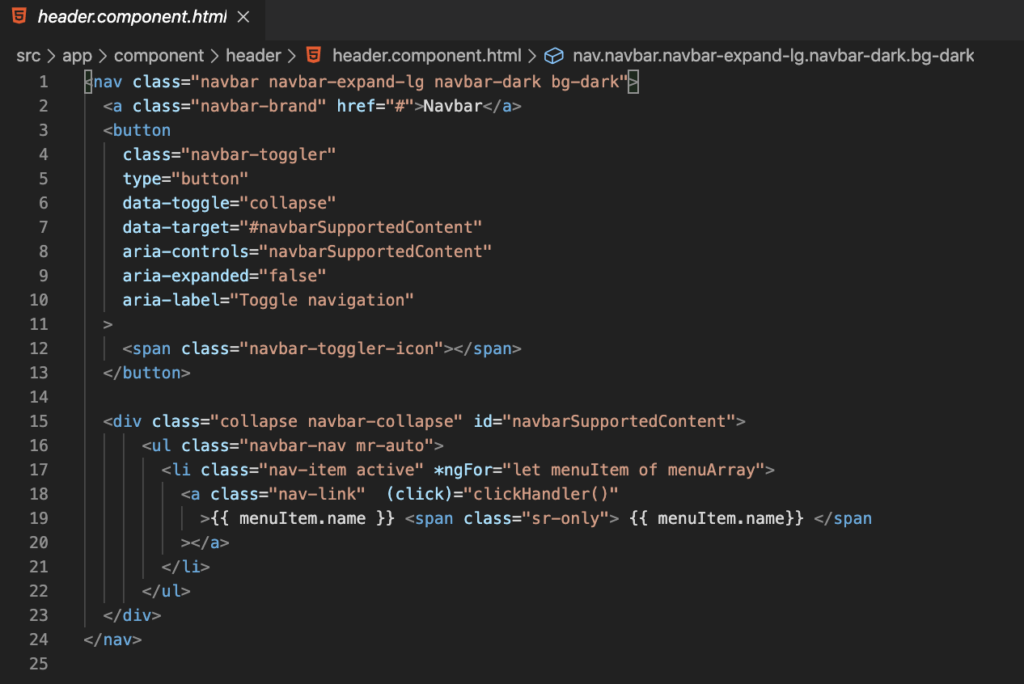
So we head on over to our Header view(html) and add the clickHandler function.

So thats officially in our header component…the parent component still doesn’t know anything about it just yet. There is one more step… ok there isn’t but we are close.

So how to we make it available? well you put it over here.

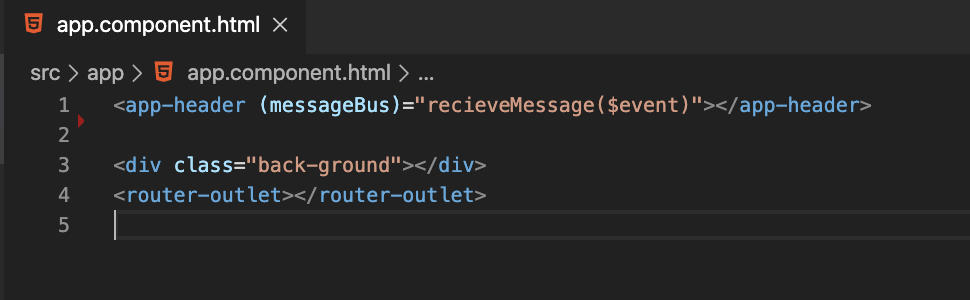
So we linkup that emitter variable called ‘messageBus’ to a function that can be found in our parent component.

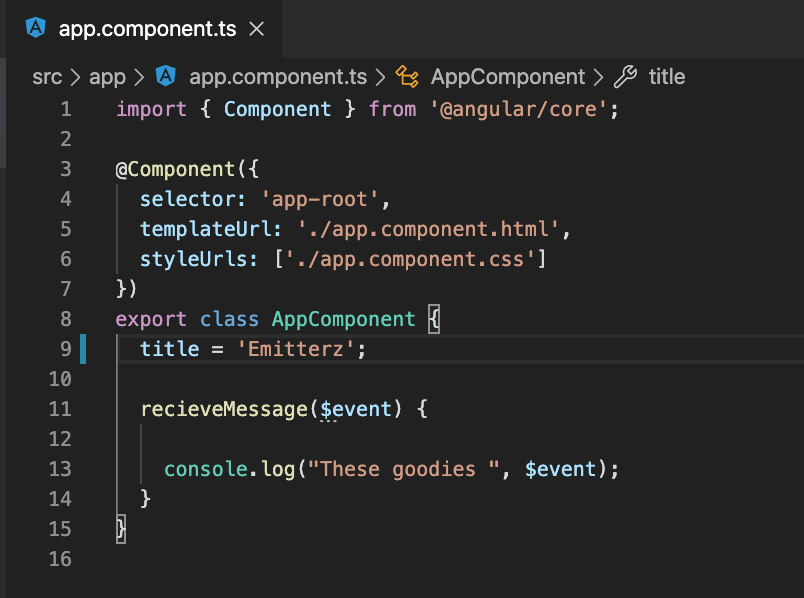
Run that, check your console click on the nav and you’ll see the console responding with your emitted message all the way from the child component.

Angular Toast Notifications, quick! (for newbies)

Alright alright, it has been a long time. Now it’s time to take you through how to add a toast notification and fast.

The quickest and easiest way I could find was using this lil npm package from ngx-toastr is what you need for a quick and simple implementation.

Following the guide and going through the steps its pretty straight forward, but if you are having any troubles like i have…on that one time, i’m happy to share my findings.

Step one:

npm install ngx-toastr --save
// and if you already have it installed
npm install @angular/animations --save

Cool so let that little console run. Once installed be sure to add the imports to your app module like so

Add them imports to your app.module.ts

As you can see I have added something a little extra to the ToastrModule.forRoot({}), in those brackets you can do a number of tricks, adjust positioning animation and the works here are some details

and there are a number of options more

Now you need to add the stylings so the app knows how to make your toastie look good, check out your styles.css the main one ya’ll know what i’m talking about. You have a number of styling imports. This is where you need to be a tiny bit careful and note what style libraries you are using is it Bootstrap? Angular material? is it something else? Luckily we can do an import for whatever your style framework that you have implemented.

// regular style toast 
@import '~ngx-toastr/toastr';
 
// bootstrap style toast 
// or import a bootstrap 4 alert styled design (SASS ONLY) 
// should be after your bootstrap imports, it uses bs4 variables, mixins, functions 
@import '~ngx-toastr/toastr-bs4-alert';
 
// if you'd like to use it without importing all of bootstrap it requires 
@import '~bootstrap/scss/functions';
@import '~bootstrap/scss/variables';
@import '~bootstrap/scss/mixins';
@import '~ngx-toastr/toastr-bs4-alert';

So the problem i was facing was that i have implemented the toast notifications and all but they were not displaying. Turns out i was not using the correct toastr import styles. So lil lesson for me be sure to take note on what styling framework/libraries you are using. I used the regular toast implementation.

For my implementation of the toast notifications i wanted to add it as a service/shared component so it can be reused throughout the app..well “web-app” I am making, it looks a lil something like this (toast-message.service.ts).

import { Injectable } from '@angular/core';
import { ToastrService } from "ngx-toastr";

@Injectable({
  providedIn: 'root'
})
export class ToastMessageService {
  constructor(private toastr: ToastrService) { }
    showSuccess(text: string, title: string) {
        this.toastr.success(text, title);
    }
    showFail(text: string, title: string) {
      this.toastr.error(text, title);
  }
}

this way i’m able to inject this service into the constructor and utilise my toastie notifications for both success and error scenarios also having the freedom of adding my own text for the success/failure situation.


import { ToastMessageService } from "../../services/toast-message.service";
export class SomeCoolComponent implements OnInit {
  constructor(private toastr: ToastMessageService) {}

ngOnInit() {
this.toastr.showSuccess(
           // Body content of toastie
           "Has been successfully created.",
           // Header of toastie
            "A Toast notification"
          );
this.toastr.showError(
           // Body content of toastie
           "Has been successfully created an error.",
           // Header of toastie
            "A Toast notification for the masses and friends"
          );
}
}

I think that that about does it. This should be quick and simple, my project is running Angular 7. Lemme know if you come across any issues.